1- Verify basic functionality and DNS
2- Join ISE to AD
3- Make an Identity Source Sequences
go to Administration > External Identity Sources and add active directory. Click on Add and then enter information of AD, you probably get the prompt for Username and Password. So, Enter your AD administrator in the prompt.
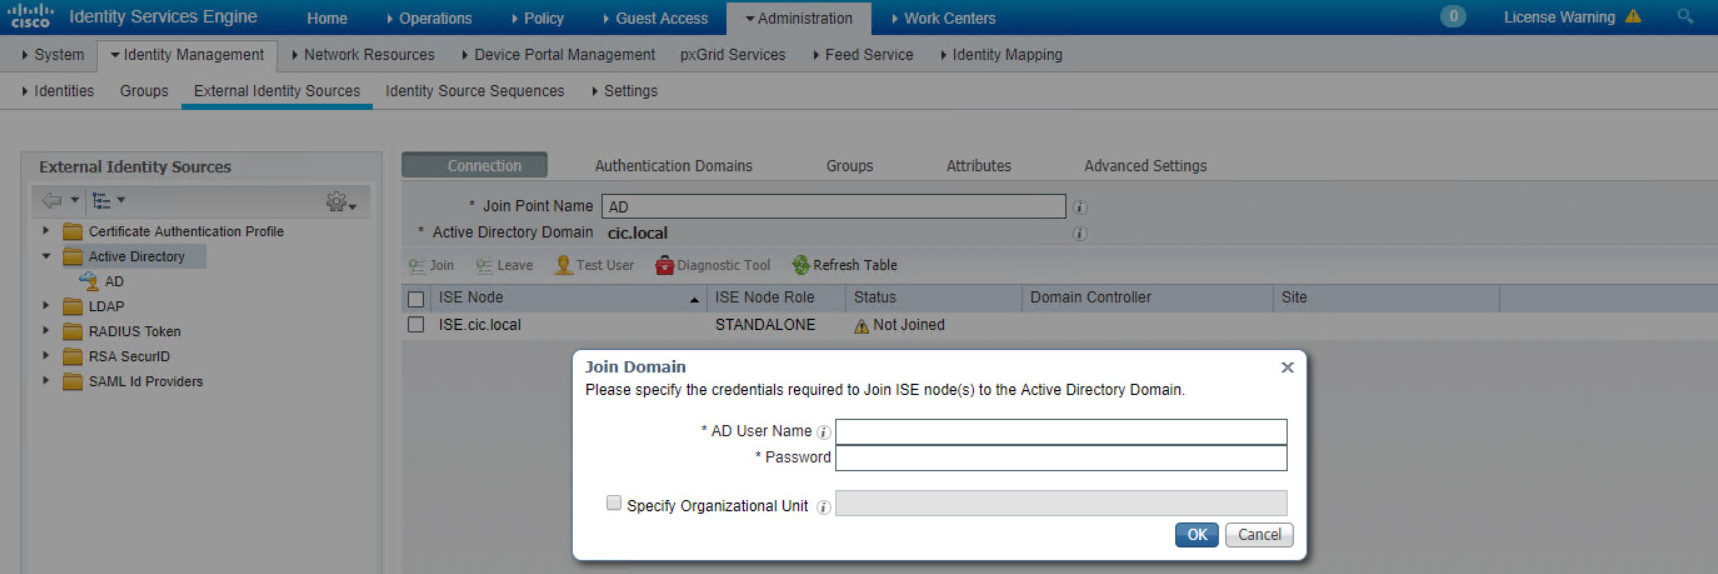
Then, if everything goes well, your ISE successfully join the Active Directory.
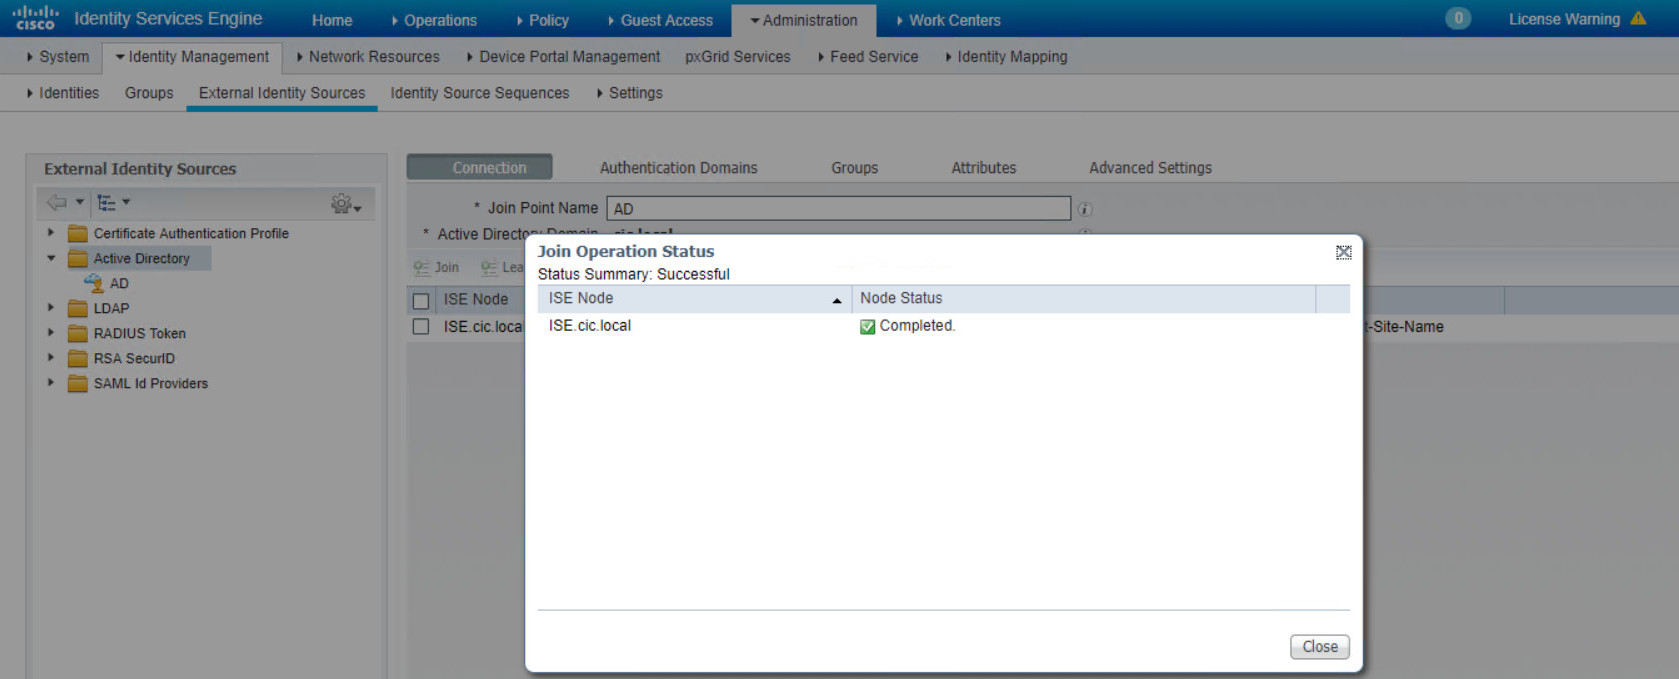
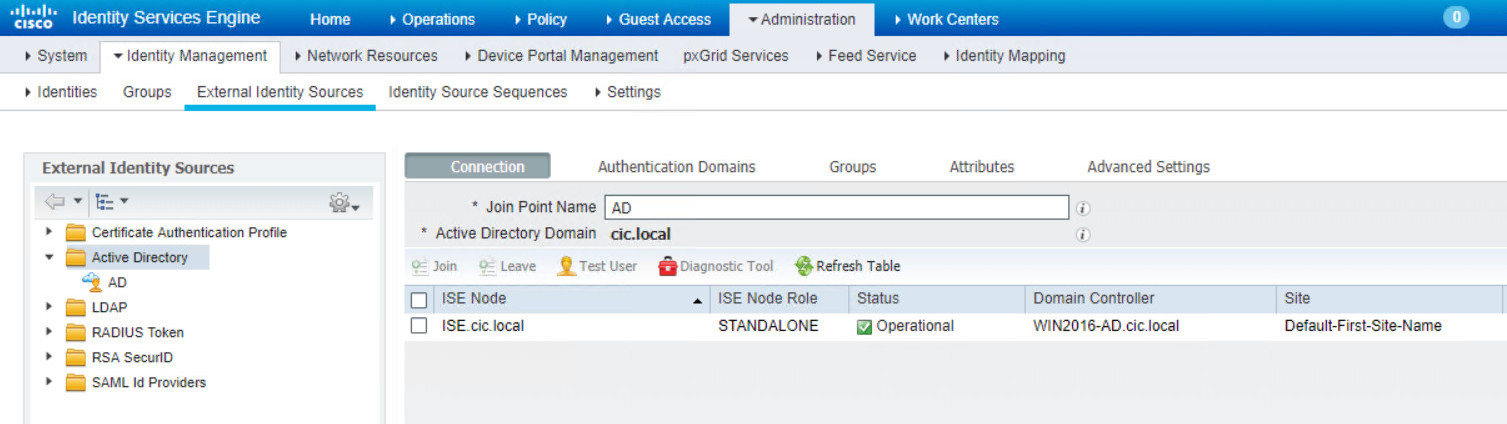
You can prove your connection by going to Active Directory again and check the Computers section. As it is shown in the picture, ISE computer should be shown.

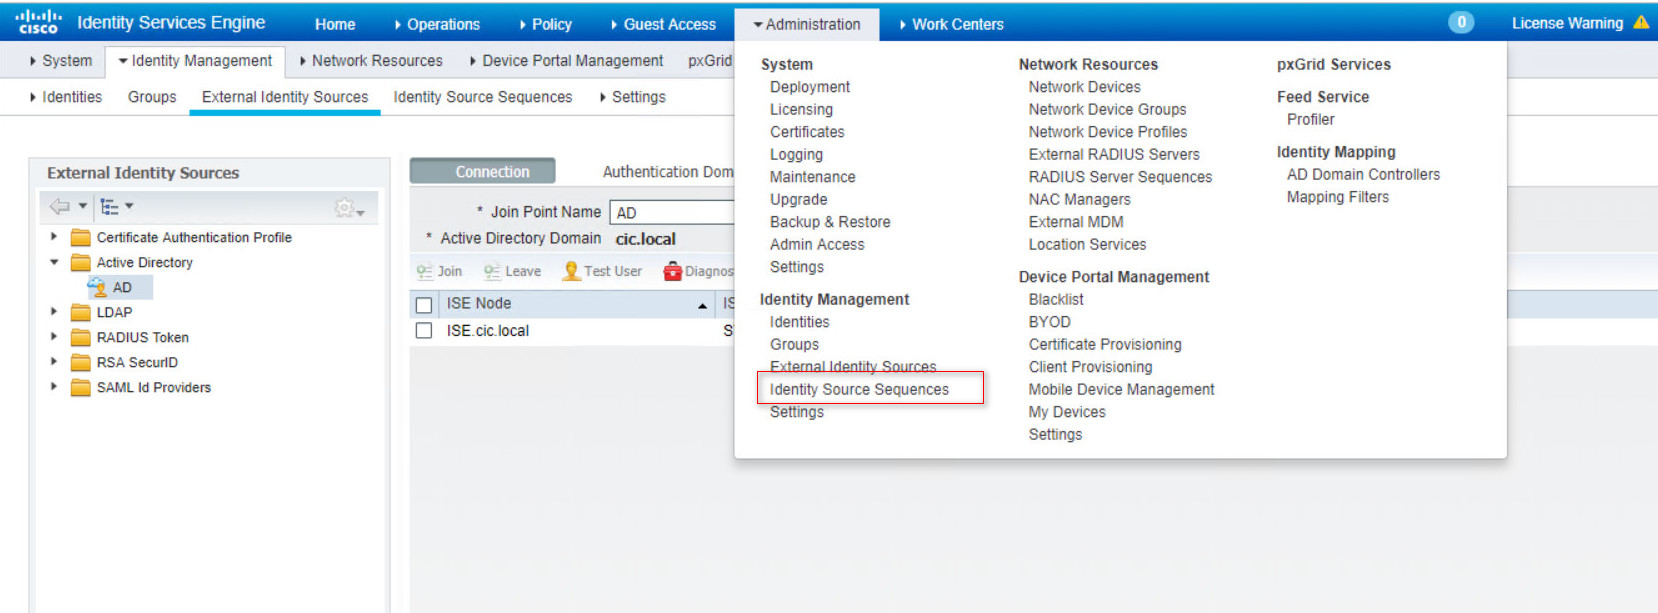
Now, we can tell the ISE to authenticate first from AD then if you can’t find the user go to local database. So, you have to make a Identity Source Sequence to change the order.
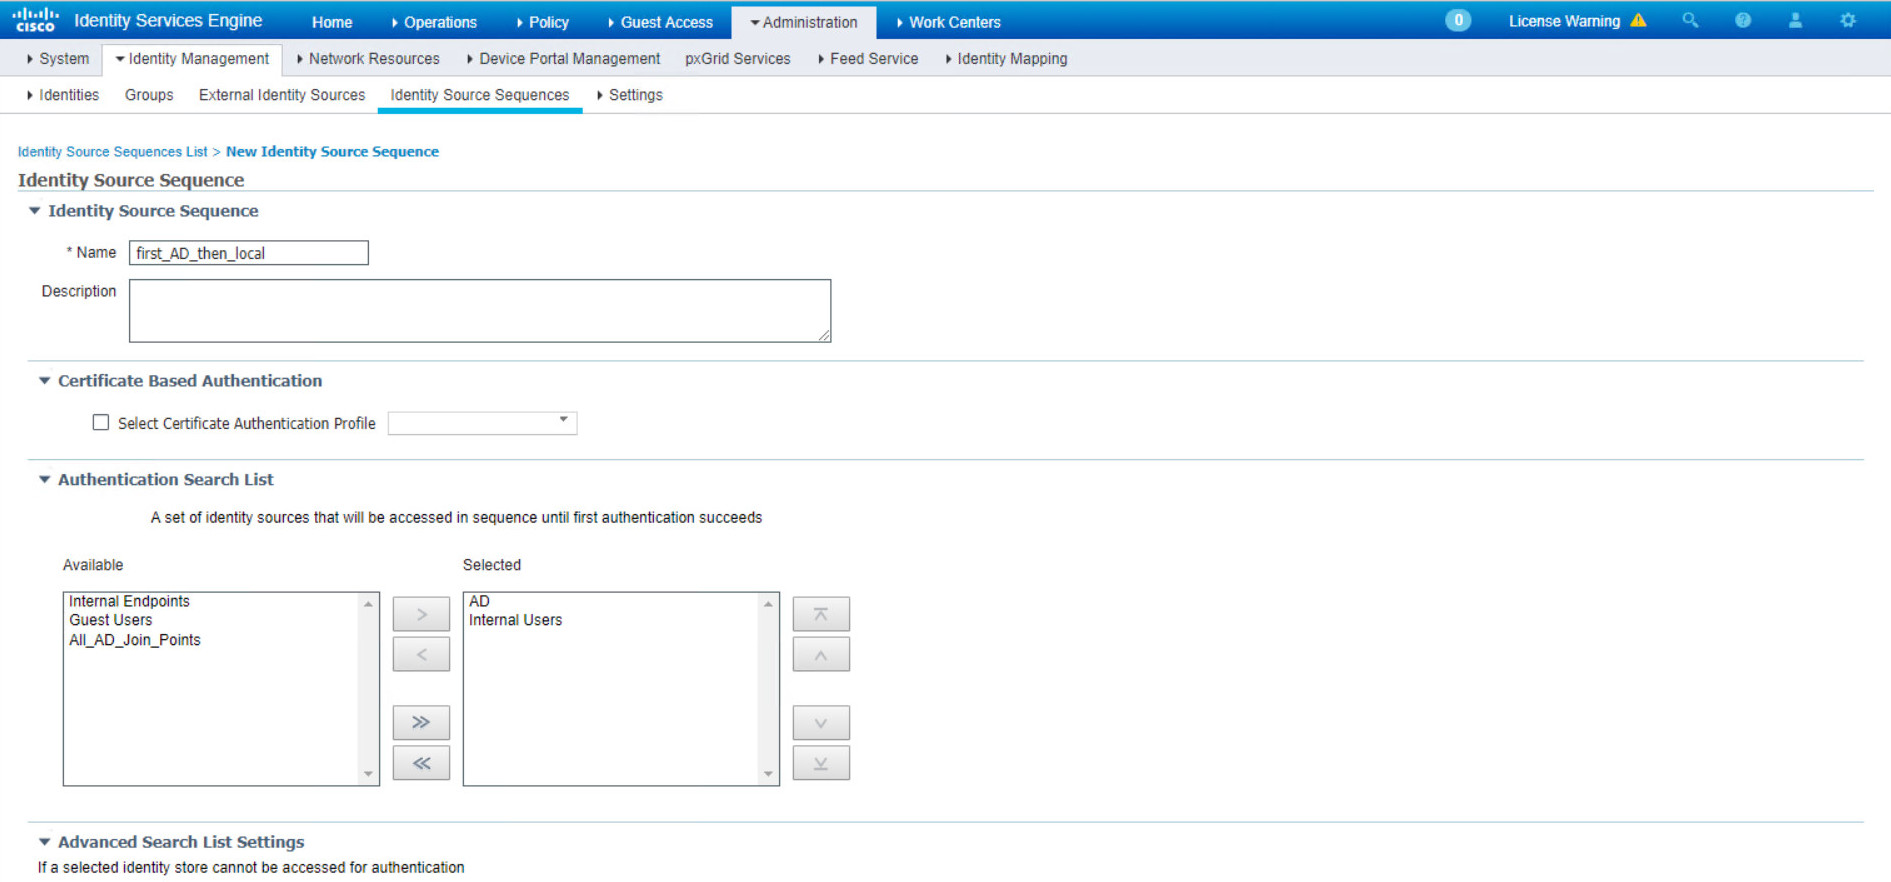
In the Name box select the optional Name then in the selected section first select AD then Internal Users. Finally select “Treat as if the user was not found and proceed to the next store in the sequence” option and save.
Now, go to Policy > Authentication Policy > Use select your previous Identity “first_AD_then_local”. 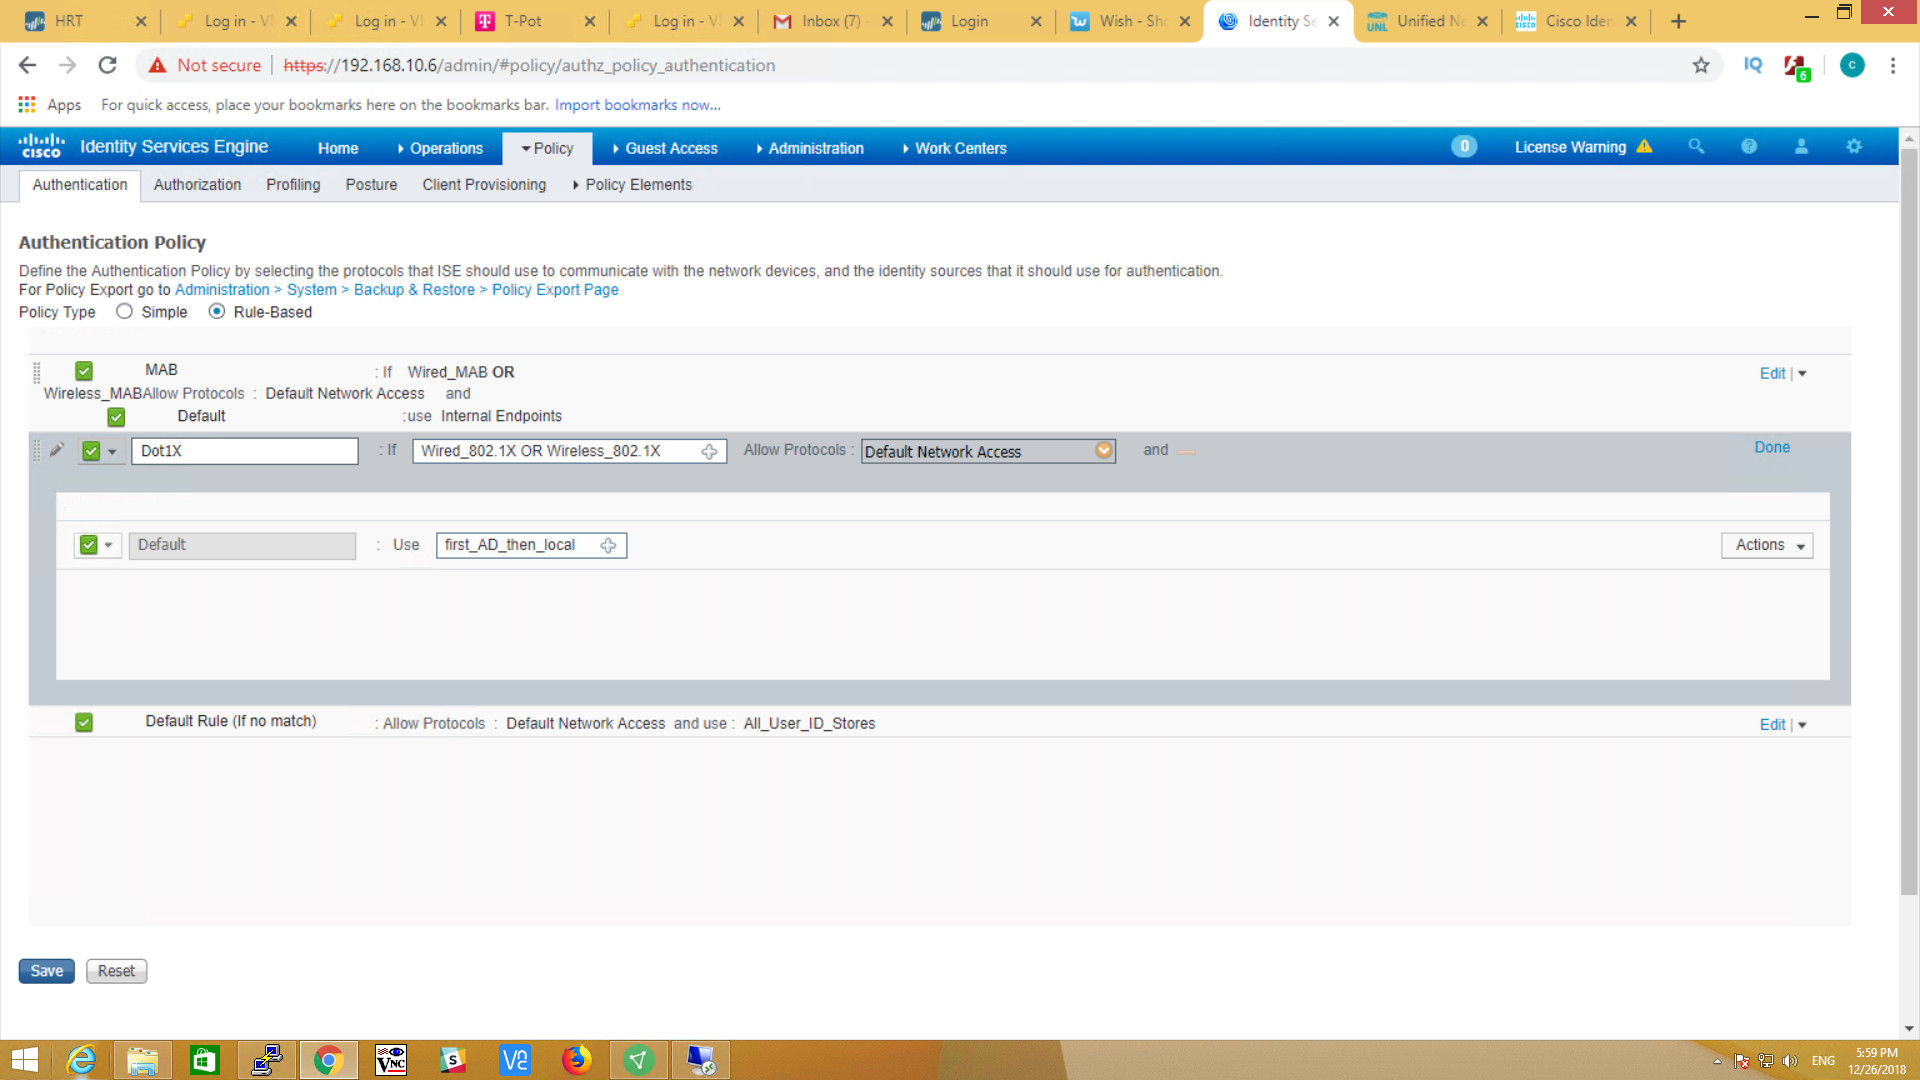
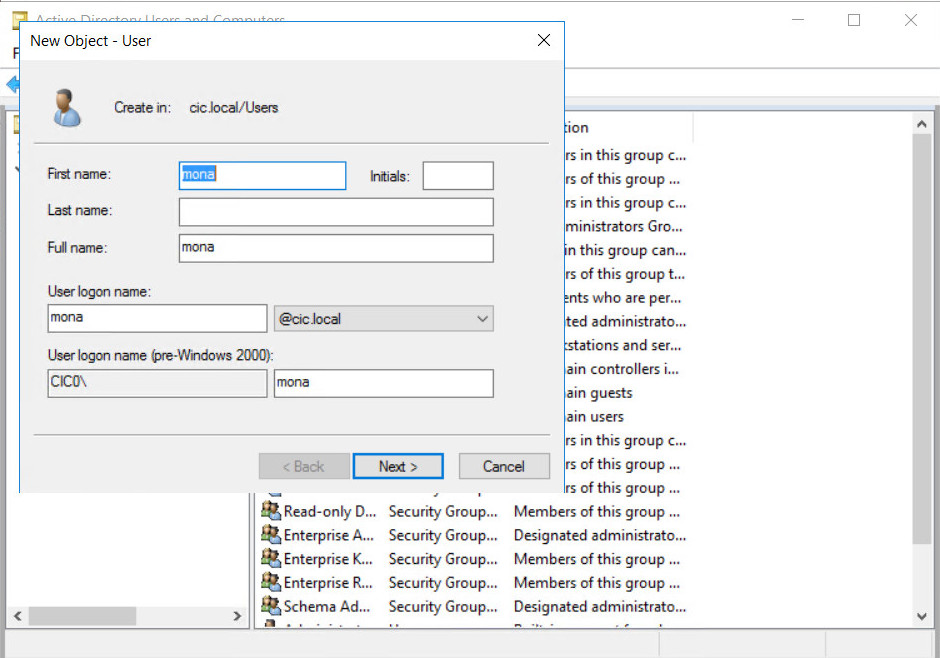
To test, you can make new a user in AD
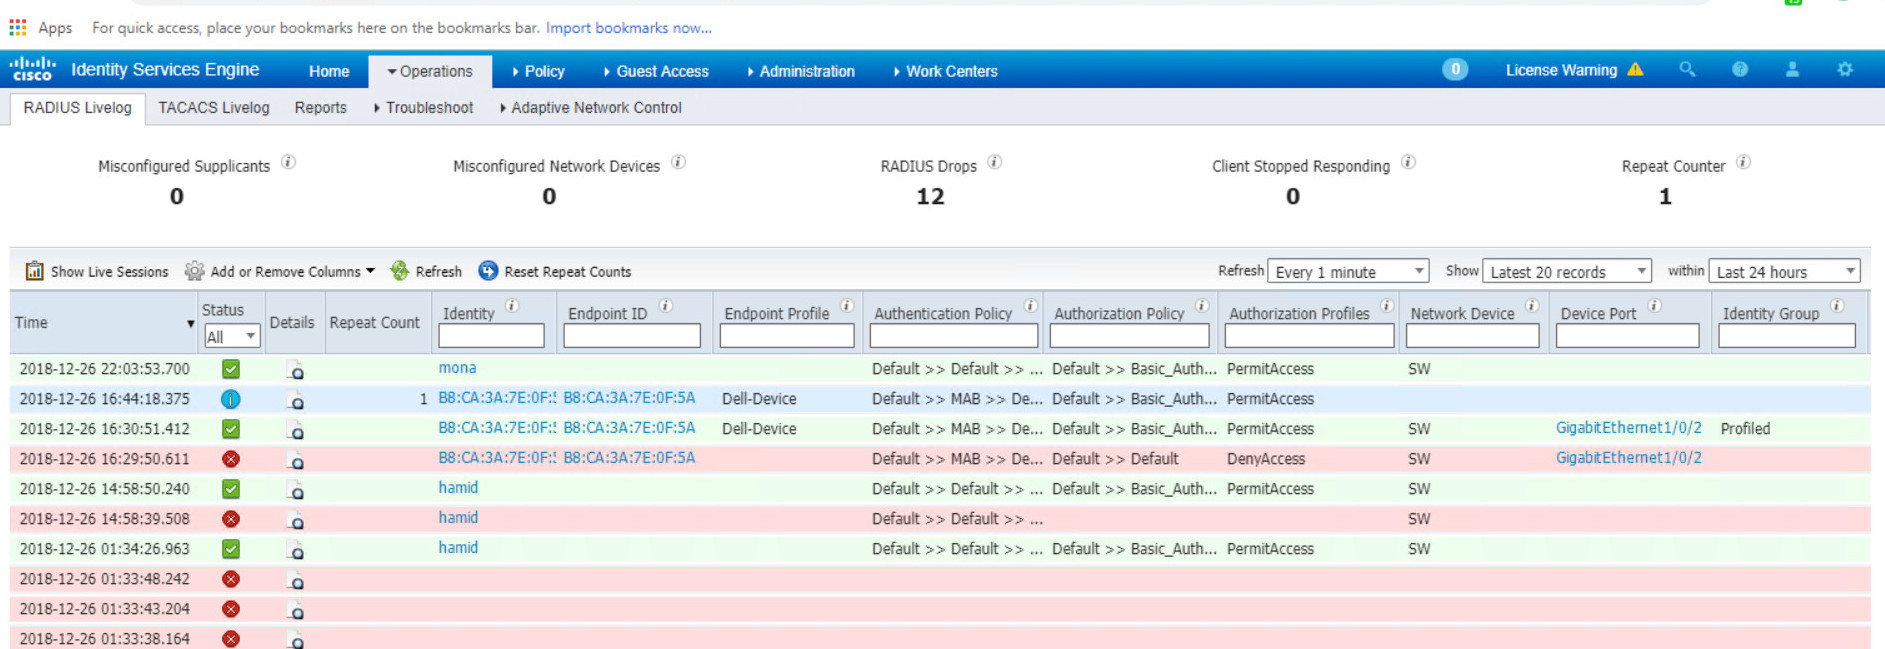
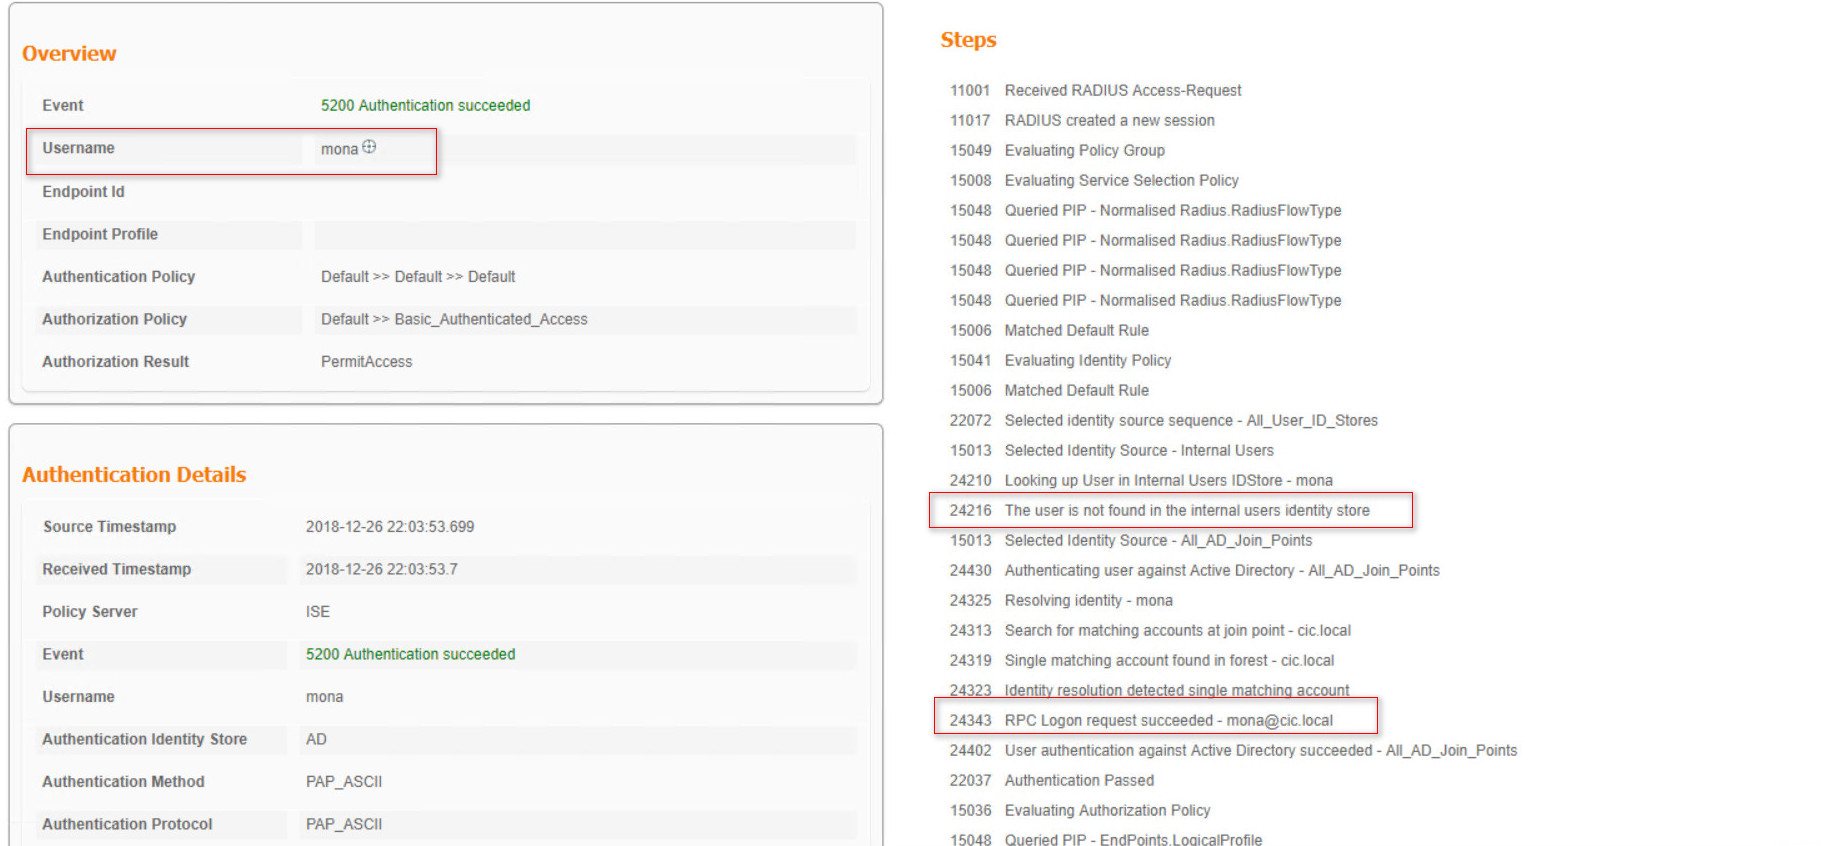
As you can see, user logs shows successful login.