Posts

Technology: Network Security
Area: Next Generation Firewalls
Vendor: Cisco
Software: 8.X, 9.X, FMC 5.X, 6.X, SFR module 5.X , 6.X
Platform: Cisco ASA, Firepower Management Center VM

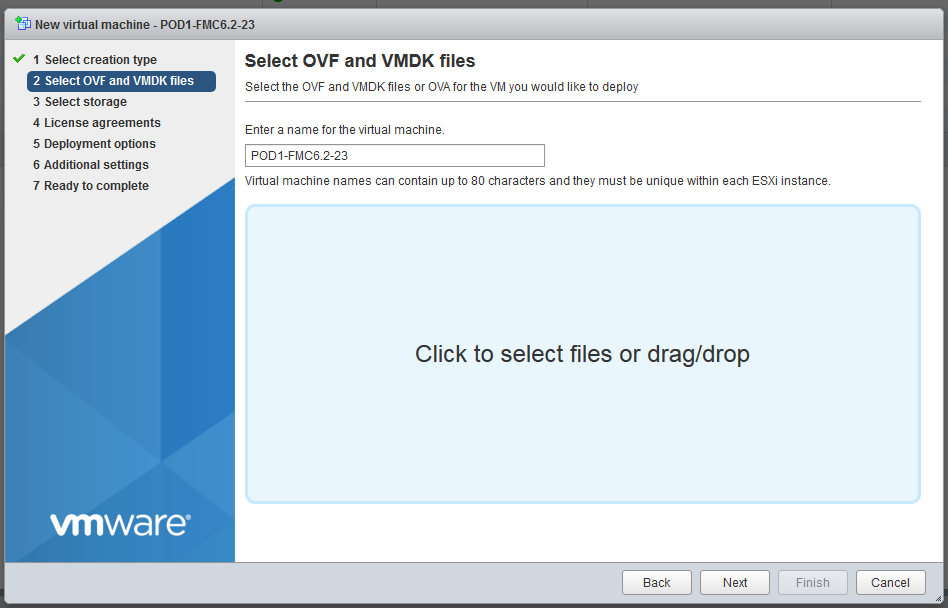
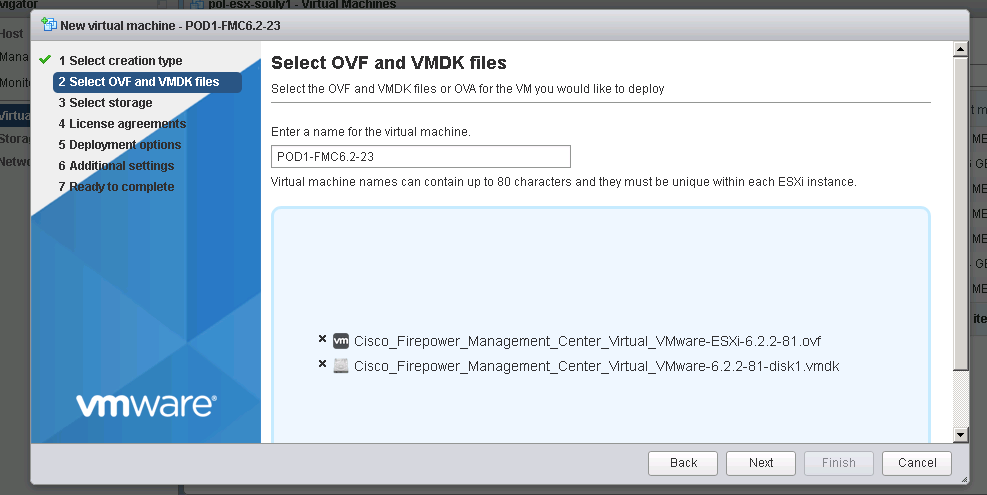
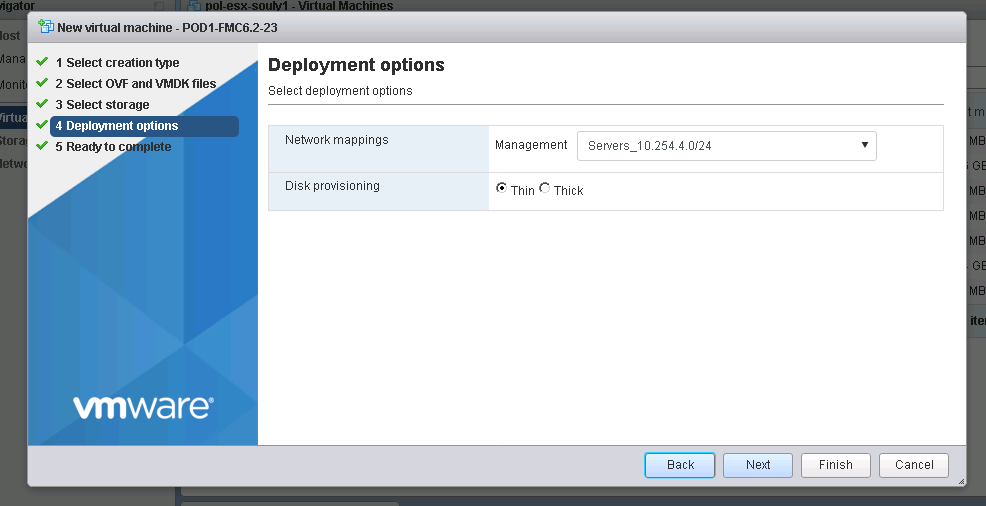
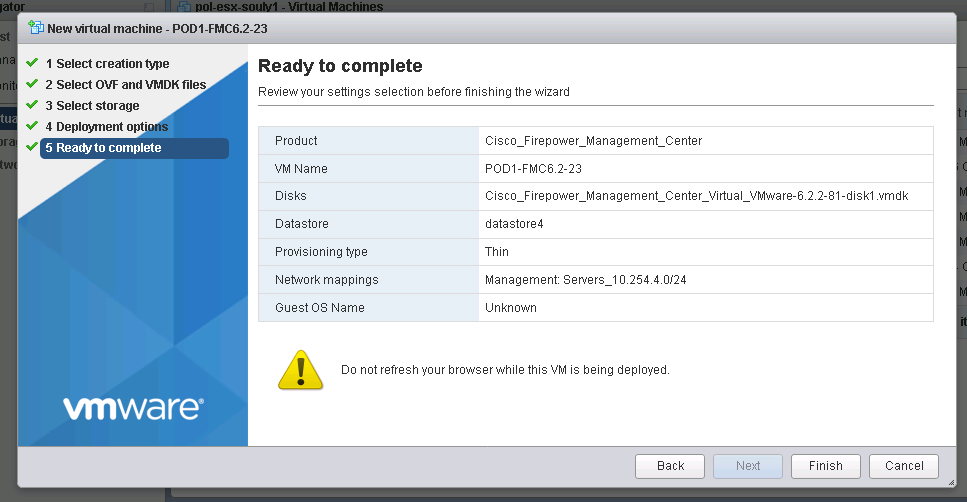
Firepower Management Center installation steps

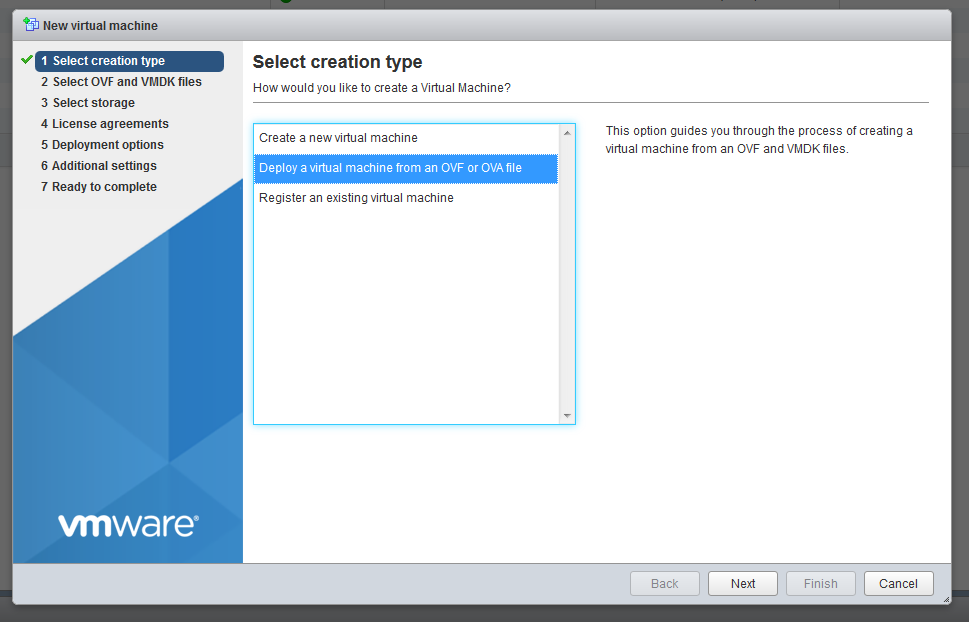
1. Deployment from OVF

FMC installation step 1


2. Assign the hostname for VM

fmc installation step 2

3. Choose the right ovf and vmdk files

FMC installation step 3


4. Select proper vNIC (the one you will use for management purposes and communication with the sensor) and disk provisioning type

FMC installation step 5


5. VM Deployment is finished

FMC installation step 6


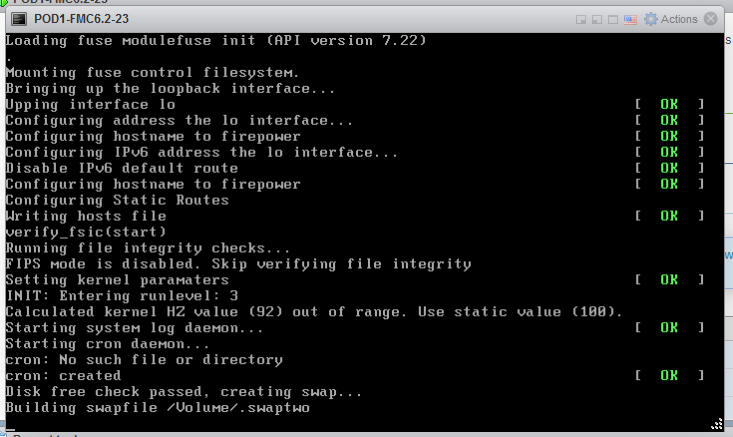
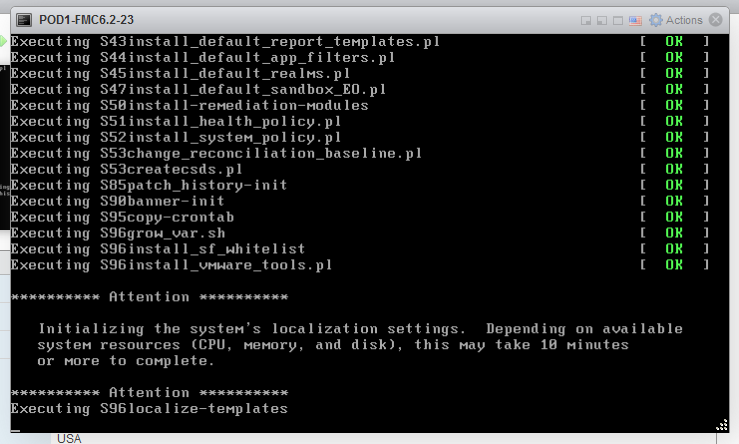
6. VM starts the installation

FMC installation step 7


Note: The Cisco Firepower Management Center Virtual instance then appears under the specified data center in the Inventory. Booting up the new VM could take up to 30-40 minutes.


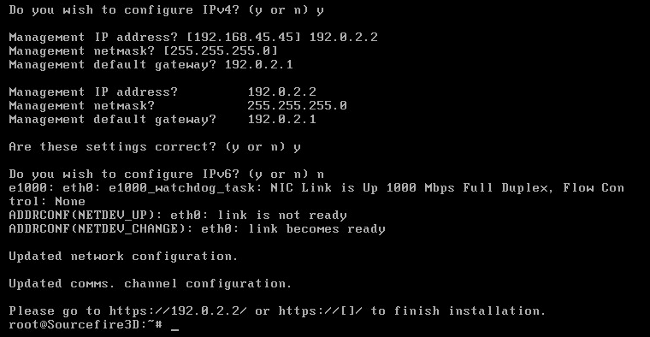
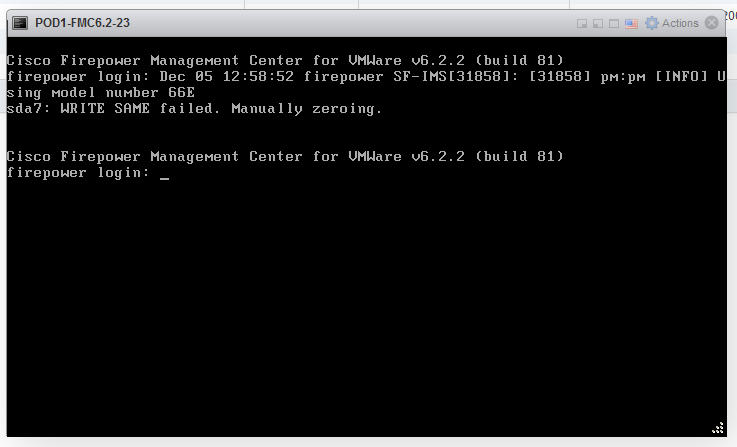
7. After about 20 minutes you will see the system first initialization message

FMC installation step 8


8. After installation is complete, the firepower login prompt appears.

Note: A message “WRITE SAME failed. Manually zeroing.” may appear after the system is booted up for the first time. This does not indicate a defect, it correctly indicates that the VMware storage driver does not support the WRITE SAME command.  The system displays this message, and proceeds with a fallback command to perform the same operation

FMC installation step 9


Default user and password for version 6.x FMC and later

  • Username: admin
  • Password: Admin123


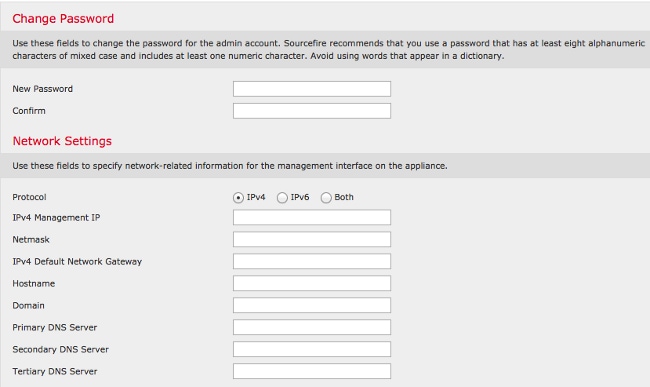
9. First login and setup

FMC installation step 10


10. Setup of FMC – CLI (you might be prompted for sudo password then provide the same password as used when loging in)

FMC installation step 11


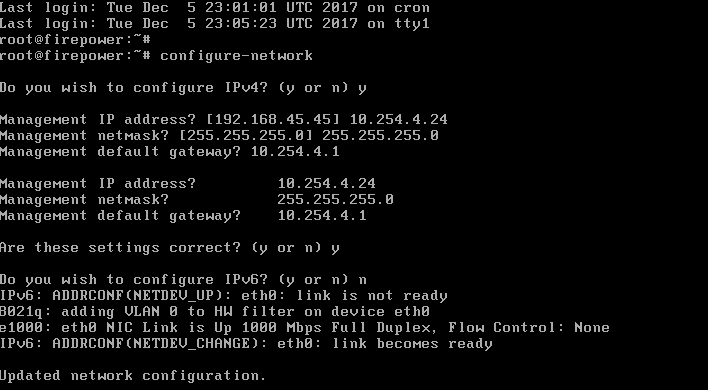
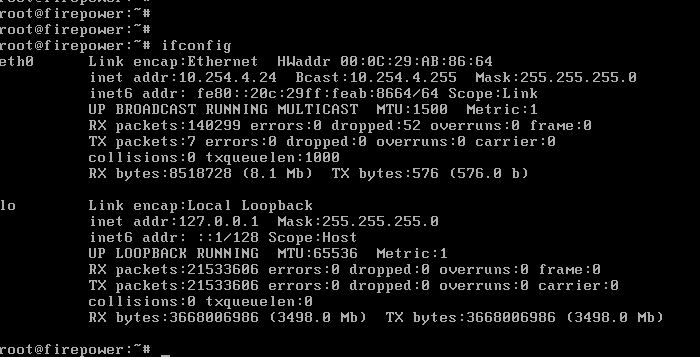
11. Checking the interfaces on FMC and ensuring proper addressing:

FMC installation step 12


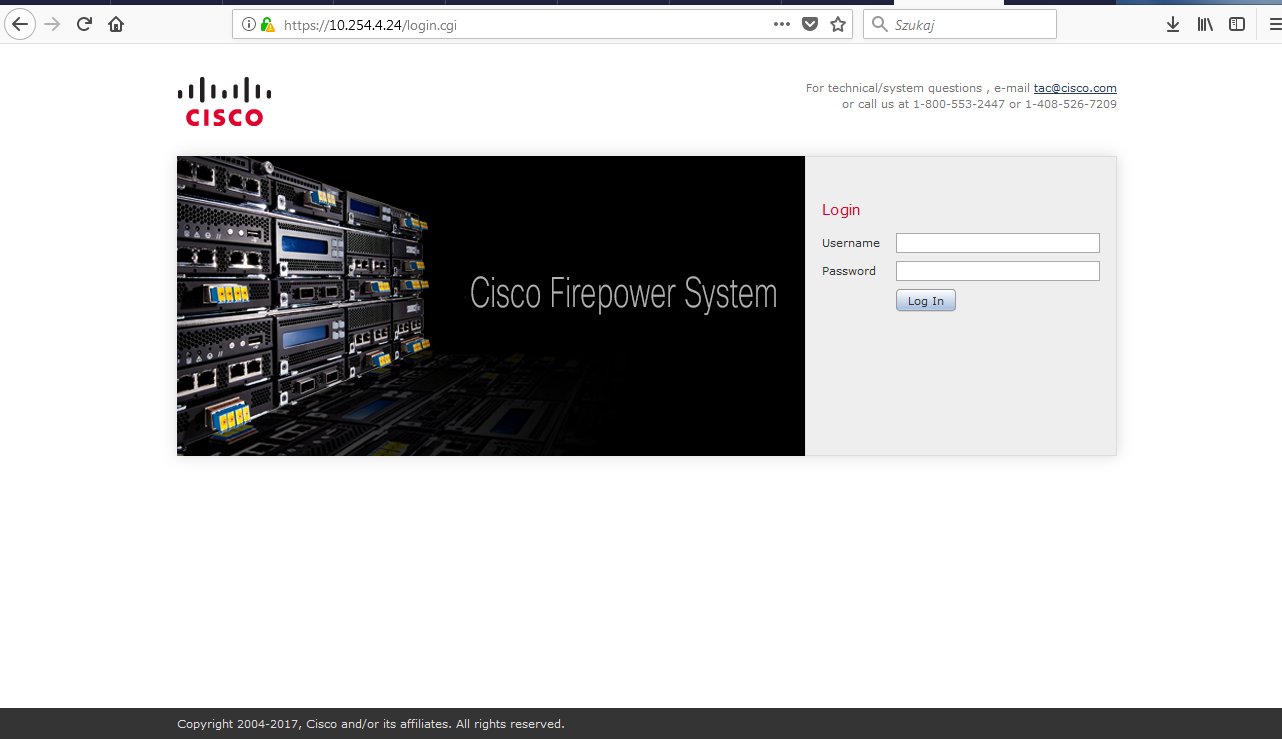
12. First GUI login comes up after typing the IP address (or FMC’s FQDN) set during installation. To login use exactly the same credentials as used for CLI login.

FMC installation step 13

Configure the Network Settings

  1. On the Sourcefire3D login prompt, use these credentials to log in:For version 5.x
    • Username: admin
    • Password: Sourcefire

    For version 6.x and later

    • Username: admin
    • Password: Admin123

    Tip: You will be able to change the default password in the initial setup process in the GUI.

  2. Initial configuration of the network is done with a script. You need to run the script as a root user. In order to switch to the root user, enter the sudo su – command along with the password Sourcefire or Admin123 (for 6.x).  Exercise caution when logged into the Management Center command line as a root user.
    admin@Sourcefire3D:~$ sudo su -
    Password:
  3. In order to begin the network configuration, enter the configure-network script as root.

    You will be asked to provide a Management IP Address, netmask, and default gateway. Once you confirm the settings, the network service restarts. As a result, the management interface goes  down and then comes back.

Perform Initial Setup

  1. After the network settings are configured, open a web browser and browse to the configured IP via HTTPS (https://192.0.2.2 in this example).  Authenticate the default SSL certificate if prompted. Use these credentials in order to log in:

    For version 5.x

    • Username: admin
    • Password: Sourcefire

    For version 6.x and later

    • Username: admin
    • Password: Admin123
  2. On the screen that follows, all of the GUI configuration sections are optional except for the password change and acceptance of the terms of service.  If the information is known, it is recommended to use the setup wizard in order to simplify the initial configuration of the Management Center. Once configured, click Apply in order to apply the configuration to the Management Center and registered devices.  A brief overview of the configuration options is as follows:
    • Change Password:  Allows you to change the password for the default admin account.  It is required to change the password.
    • Network Settings:  Allows you to modify the previously configured IPv4 and IPv6 network settings for the management interface of the appliance or virtual machine.
    • Time Settings:  It is recommended that you sync the Management Center with a reliable NTP source. The IPS sensors can be configured through system policy to synchronize their time with the Management Center.  Optionally, the time and display time zone can be set manually.
    • Recurring Rule Update Imports:  Enable recurring Snort rule updates and optionally install now during the initial setup.
    • Recurring Geolocation Updates:  Enable recurring geolocation rule updates and optionally install now during the initial setup.
    • Automatic Backups:  Schedule automatic configuration backups.
    • License Settings:  Add the feature license.
    • Device Registration:  Allows you to add, license, and apply initial access control policies to preregistered devices.  The hostname/IP address and registration key should match the IP address and registration key configured on the FirePOWER IPS module.
    • End User License Agreement:  Acceptance of the EULA is required.

  • Source : cisco.com