
Configure the Network Settings
- On the Sourcefire3D login prompt, use these credentials to log in:For version 5.x
- Username: admin
- Password: Sourcefire
For version 6.x and later
- Username: admin
- Password: Admin123
Tip: You will be able to change the default password in the initial setup process in the GUI.
- Initial configuration of the network is done with a script. You need to run the script as a root user. In order to switch to the root user, enter the sudo su – command along with the password Sourcefire or Admin123 (for 6.x). Exercise caution when logged into the Management Center command line as a root user.
admin@Sourcefire3D:~$ sudo su -
Password:
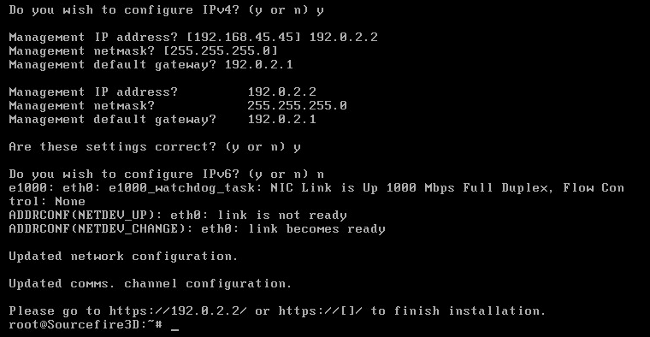
- In order to begin the network configuration, enter the configure-network script as root.

You will be asked to provide a Management IP Address, netmask, and default gateway. Once you confirm the settings, the network service restarts. As a result, the management interface goes down and then comes back.
Perform Initial Setup
- After the network settings are configured, open a web browser and browse to the configured IP via HTTPS (https://192.0.2.2 in this example). Authenticate the default SSL certificate if prompted. Use these credentials in order to log in:
For version 5.x
- Username: admin
- Password: Sourcefire
For version 6.x and later
- Username: admin
- Password: Admin123
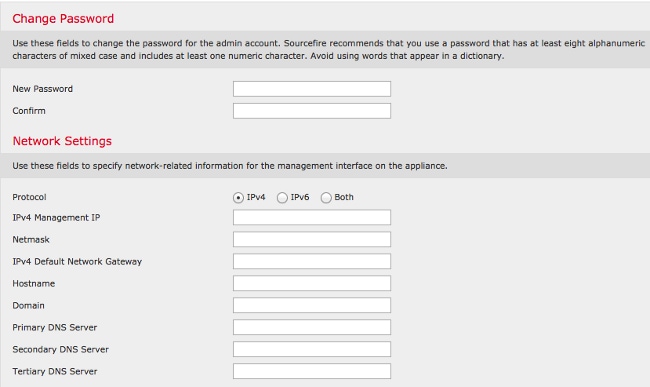
- On the screen that follows, all of the GUI configuration sections are optional except for the password change and acceptance of the terms of service. If the information is known, it is recommended to use the setup wizard in order to simplify the initial configuration of the Management Center. Once configured, click Apply in order to apply the configuration to the Management Center and registered devices. A brief overview of the configuration options is as follows:
- Change Password: Allows you to change the password for the default admin account. It is required to change the password.
- Network Settings: Allows you to modify the previously configured IPv4 and IPv6 network settings for the management interface of the appliance or virtual machine.
- Time Settings: It is recommended that you sync the Management Center with a reliable NTP source. The IPS sensors can be configured through system policy to synchronize their time with the Management Center. Optionally, the time and display time zone can be set manually.
- Recurring Rule Update Imports: Enable recurring Snort rule updates and optionally install now during the initial setup.
- Recurring Geolocation Updates: Enable recurring geolocation rule updates and optionally install now during the initial setup.
- Automatic Backups: Schedule automatic configuration backups.
- License Settings: Add the feature license.
- Device Registration: Allows you to add, license, and apply initial access control policies to preregistered devices. The hostname/IP address and registration key should match the IP address and registration key configured on the FirePOWER IPS module.
- End User License Agreement: Acceptance of the EULA is required.
- Source : cisco.com