RIP

  • Maximum hop count 15
  • RIP ( 30 Sec update to other routers)
  • Doesn’t analyse traffi
  • Distance Vector
  • RIPng( send through hex to other routers FF2::9)

EIGRP

  • Only to Cisco Protocol
  • Distance vector
  • Analyses traffic
  • Autonomous system limitation
  • Pays attention to bandwidth too. up to 15 routers is good
    in fact, with the same autonomous number routers can speak together. if autonomous number of one of routers is different. The network will be down.

OSPF

  • Larger Network
  • Link state(Dikestra- Shortest path first)
  • Very scalable
  • Uses area instead of autonomous
  • Each area no more 15 routers

Configure rip V2
conf t
(config)# router rip
(config)# version 2
(config)# net 10.1.1.4
(config)# net 192.168.1.0
(config)# no auto-summary

Important command
conf t
(config)# do sh start ( with do that is not necessary to be out)
(config)# do sh ip int br ( good)
(config)# do sh protocols( show protocols )
(config)# do sh controllers ( hardware information)
(config)# do sh ip rip
(config)# do sh ip route

debug ip rip( behind scence)
no debug ip rip

Set IPV6 for
conf t
(config)# ipv6 unicast-routing ( for writing ipv6)
(config)# int f0/0
(config)# ipv6 address 2001:3200….

For IPV6
conf t
(config)# ipv6 router rip 1
(config)# int f0/0
(config)# ipv6 rip 1 enable

sh ipv6 route

RIP timer
router rip timers basic 30(interval between update) 180(Invalid) 180(Holddown) 240(Flush)

conf t
(config)# router eigrp 100(autonomous number can share update in the same autonomous system)
(config)# net 192.168.10.10
(config)# net 10.10.10.0.1
(config)# no auto-summary

conf t
(config)# router ospf 100(process ID)
(config)# net 192.168.1.0 0.0.0.255(inverse subnetmask=wildmask card) area 0
(config)# net 10.1.1.4 0.0.0.3 area 0

show ip ospf neighbour

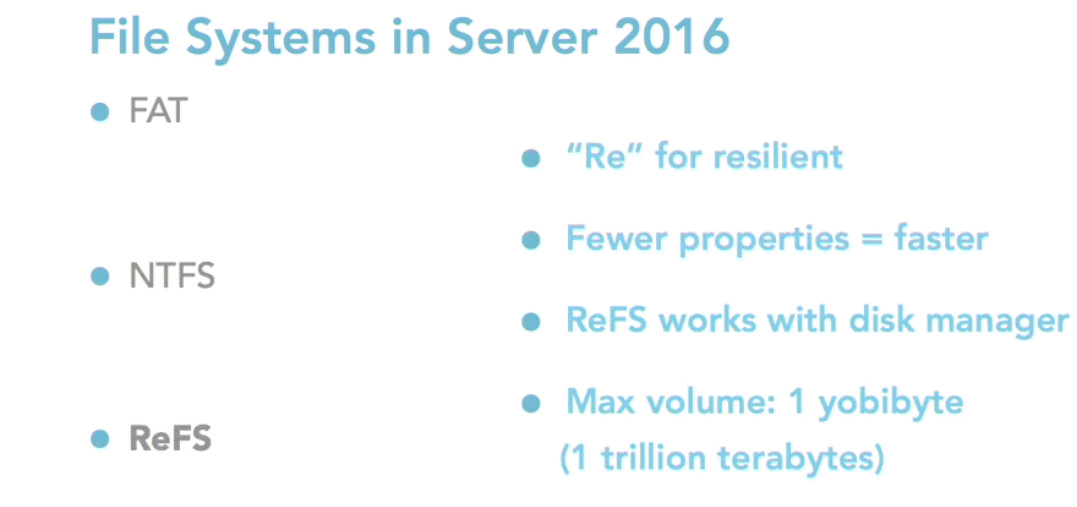
The Resilient File System (ReFS) is Microsoft’s newest file system, designed to maximize data availability, scale efficiently to large data sets across diverse workloads, and provide data integrity by means of resiliency to corruption. It seeks to address an expanding set of storage scenarios and establish a foundation for future innovations.

Key benefits

Resiliency

ReFS introduces new features that can precisely detect corruptions and also fix those corruptions while remaining online, helping provide increased integrity and availability for your data:

  • Integrity-streams – ReFS uses checksums for metadata and optionally for file data, giving ReFS the ability to reliably detect corruptions.
  • Storage Spaces integration – When used in conjunction with a mirror or parity space, ReFS can automatically repair detected corruptions using the alternate copy of the data provided by Storage Spaces. Repair processes are both localized to the area of corruption and performed online, requiring no volume downtime.
  • Salvaging data – If a volume becomes corrupted and an alternate copy of the corrupted data doesn’t exist, ReFS removes the corrupt data from the namespace. ReFS keeps the volume online while it handles most non-correctable corruptions, but there are rare cases that require ReFS to take the volume offline.
  • Proactive error correction – In addition to validating data before reads and writes, ReFS introduces a data integrity scanner, known as a scrubber. This scrubber periodically scans the volume, identifying latent corruptions and proactively triggering a repair of corrupt data.

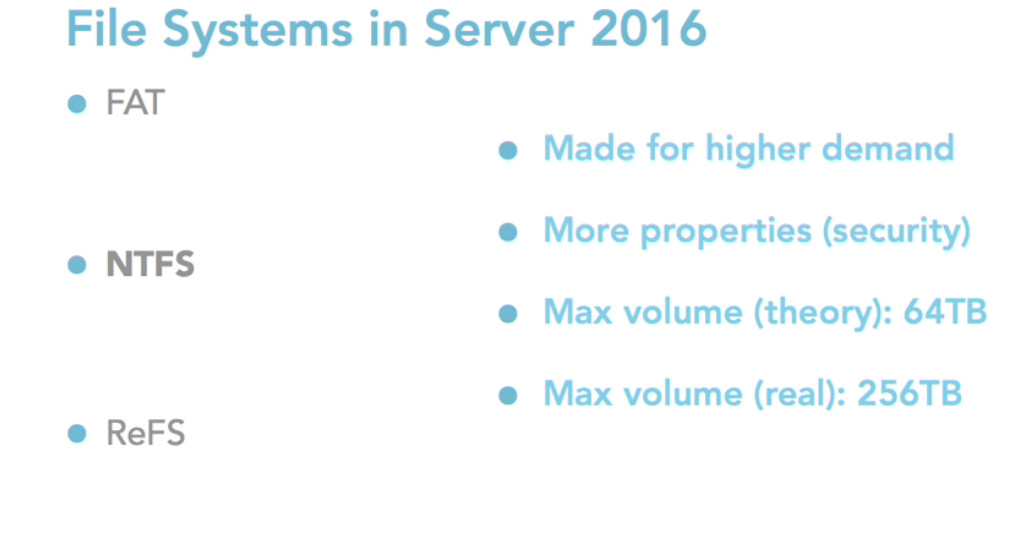
The following features are only available on ReFS:

Functionality ReFS NTFS
Block clone Yes No
Sparse VDL Yes No
Real-time tier optimization Yes (on Storage Spaces Direct) No


The following features are unavailable on ReFS at this time:

Functionality ReFS NTFS
File system compression No Yes
File system encryption No Yes
Data Deduplication No Yes
Transactions No Yes
Hard links No Yes
Object IDs No Yes
Short names No Yes
Extended attributes No Yes
Disk quotas No Yes
Bootable No Yes
Supported on removable media No Yes
NTFS storage tiers No Yes

Windows/WinSxS

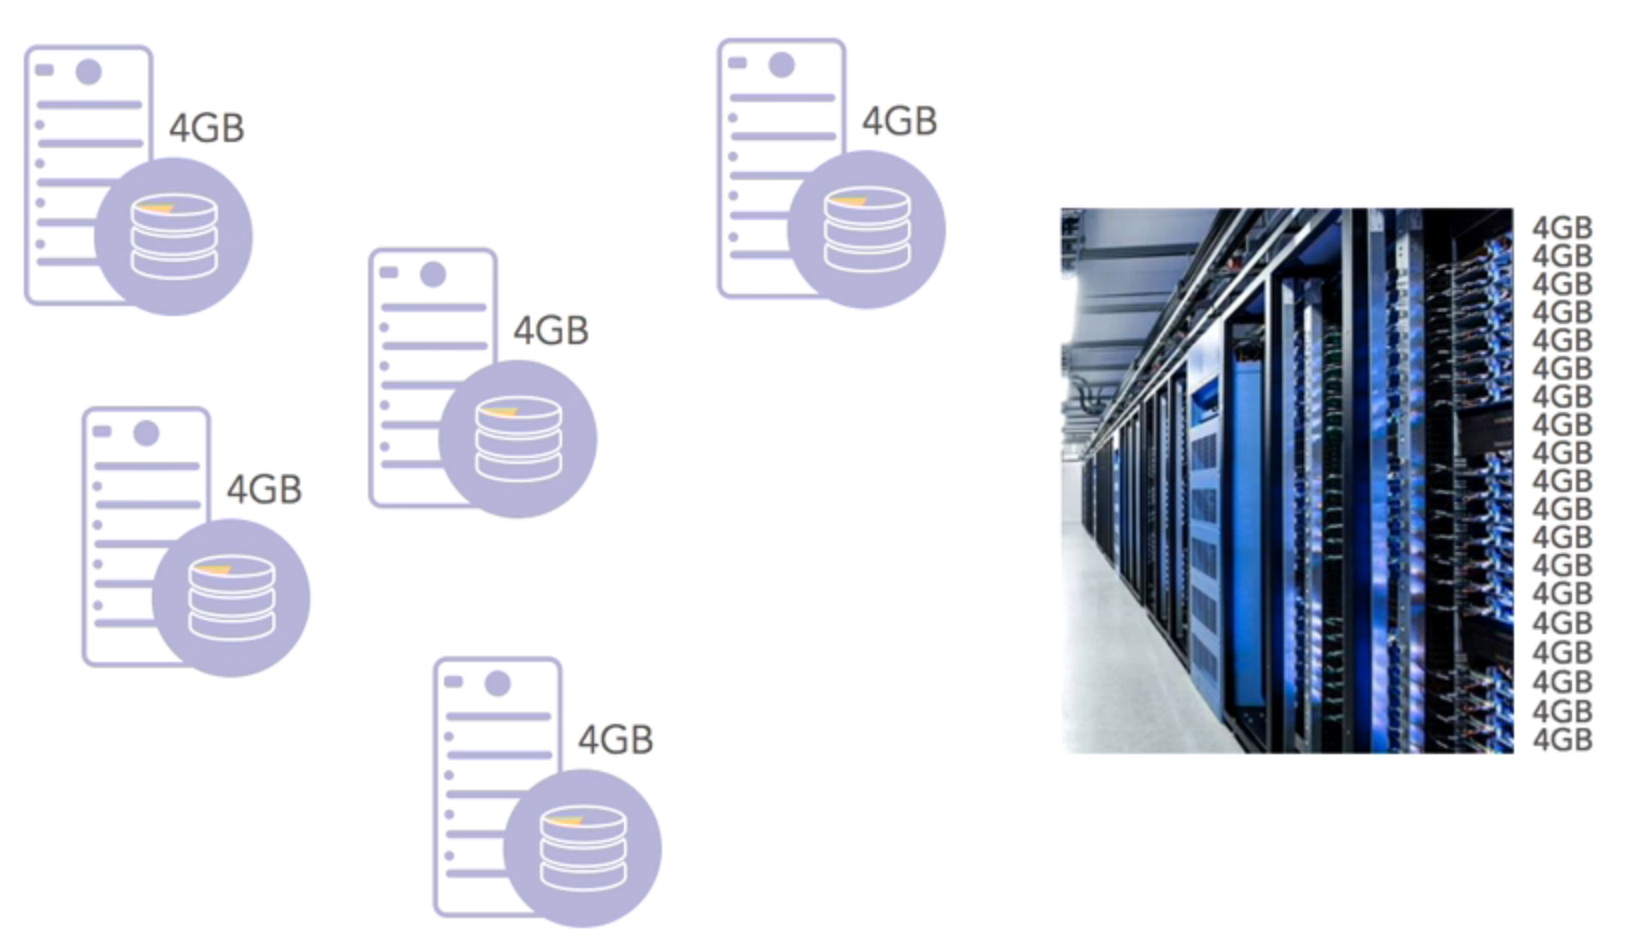
There is a folder in widnows path that if you have a more than one server, it can use 4G resources. As shown below, your resources may be wasted by this strategy.

So here I am back on our Windows 2016 Server. And I’m going to show you how to remove this Windows side by side directory, reclaim the storage space on the server, and plug this security hole. But I do have one important safety tip before we get started. Do not, under any circumstances, simply delete that side by side directory from your hard drive. It not only contains the files needed to install new features, but it also contains the DLLs and other files needed by features that are already installed.

Just write in a Powershell this command:

Powershell> Get-WindowsFeature | Where-Object -FilterScript{$_.Installed -Eq $FALSE}|Uninstall-WindowsFeature -Remove

Don’t worry! you can install whenever you need these file. But, in installation process it will ask you where is the path of Media to Install?


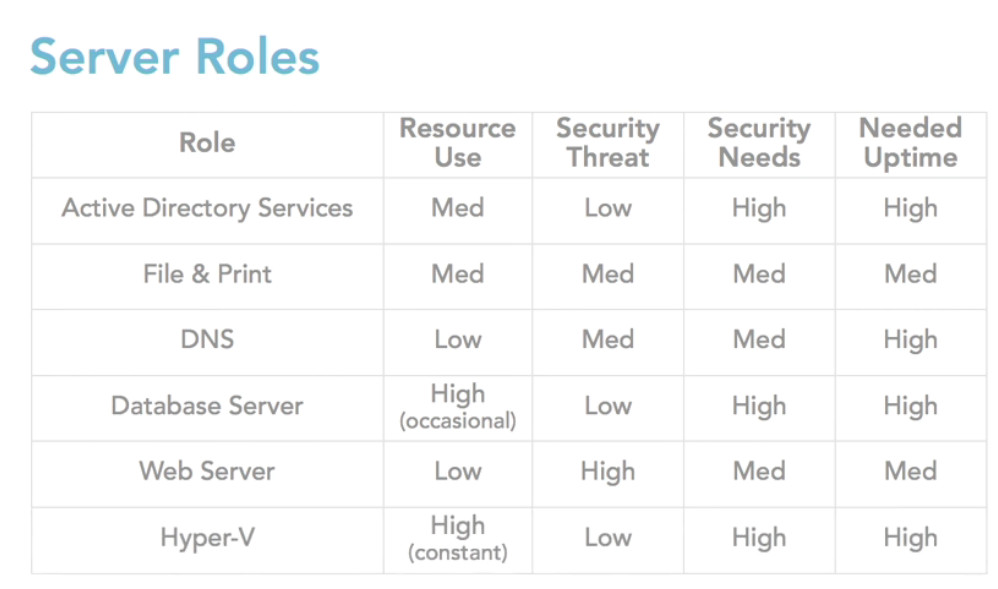
It it very significant to have a plan for your server. Because some roles in servers have a conflict with another one. Therefore, it is important to know which role uses how much resources. Based on Scott M Burrell research, as I listed below, for example, you cannot use high resources items such as Database and Hyper-V together.

you can download this file to manage your server better. It is a kind of sheet which you can manage your server.

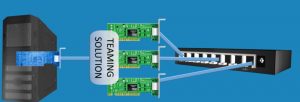
NIC Teaming, also known as load balancing and failover (LBFO), allows multiple network adapters on a computer to be placed into a team for the following purposes:

  • Bandwidth aggregation
  • Traffic fail-over to prevent connectivity loss in the event of a network component failure

You will need at least one adapter, which can be used for separating traffic, that is using Virtual LANs (VLANs). In order to take advantage of the LBFO benefits of NIC Teaming, you will need at least two adapters, and Windows Server 2012 will support up to 32 adapters in a single team.

In Windows server it’s called NIC Teaming, and the purpose is to take multiple physical network controllers and make them appear to Windows as one network interface. Turning on NIC Teaming is simple enough, but you will be asked a few questions that are easier to answer if we take a moment to understand the NIC Teaming environment. So let’s take a look at a couple of scenarios. Consider a file server that is heavily used throughout our network.

Everyone needs to be able to find this file server and this server needs to be able to send large amount of data in different directions at the same time very quickly. The requests from each work station are small enough to not generate a lot of traffic. For this situation it would be nice if all of the traffic to the server could be funneled through the same physical adapter and each client request could be routed through whichever physical NIC was being least used at the time.

NIC Teaming Configuration

Load Balancing Mode

  • Address Hashing
  • Hyper-V port
  • Dynamic

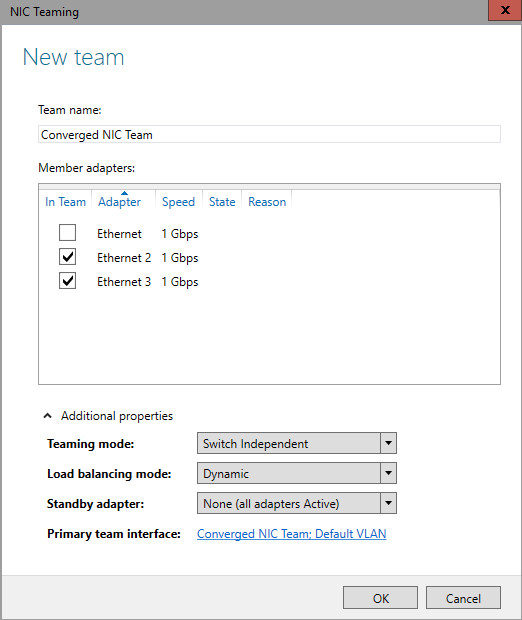
to configure:


  1. In Server Manager, click Local Server.
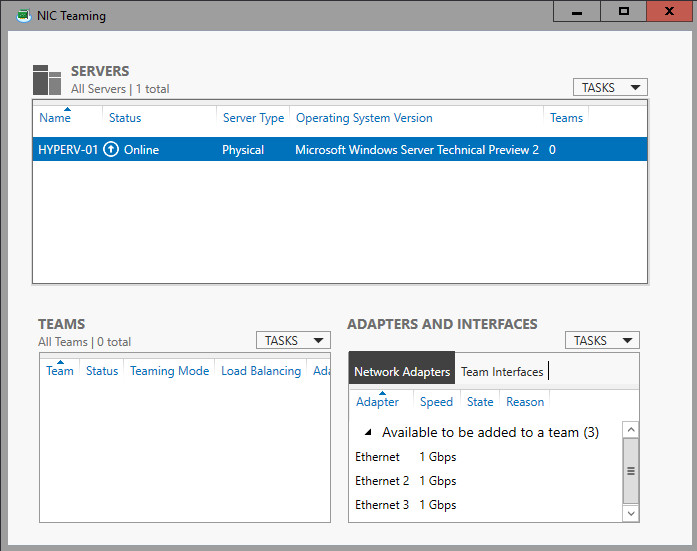
  2. In the Properties pane locate NIC Teaming, and then click the link Disabled to the right. The NIC Teaming dialog box opens.

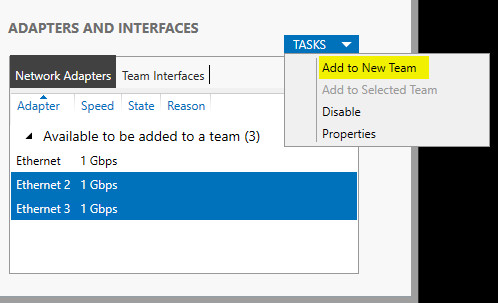
3. In Adapters and Interfaces, select the network adapters that you want to add to a NIC Team.

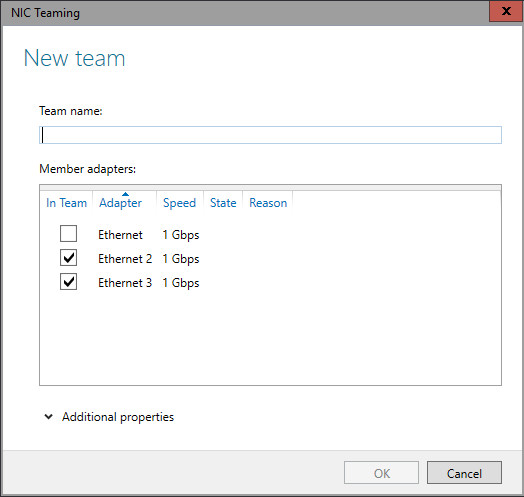
4.Click TASKS, and then click Add to New Team.


There are several commands on Cisco, I have tried to collect some effective commands:

Banner
conf t
banner motd #Unauthorized access to this device is prohibited!#

Password for console
conf t
(config)# line console 0
(config)# password yourpassword
(config)# login

Password for vty
conf t
(config)#line vty 0
(config)#password myvty0
(config)#login

Password for vty
conf t
(config)# line vty 1 4
(config)# password myvty
(config)# login

Secure access for previlage mode
conf t
(config)# enable password yourpassword
(config)# enable secret Mysecretpasword //encrypted

Secure all password

conf t
(config)#service password-encryption

Creating Vlans
conf t
(config)# int vlan1
(config)# ip address 192.168.1.2. 255.255.255.0
(config)# no shut
(config)# do wr

Default Gateway
conf t
(config)# ip default-gateway 192.168.1.1
(config)# no shut
(config)# do wr

Speed Control
conf t
(config)#int f0/2
(config)#speed 100
(config)#duplex full

Port Security
conf t
(config)# int fa0/2
(config)# switchport mode access
(config)# switchport port-security mac-address sticky
(config)# switchport port-security maximum 1
(config)# switchport port-security violation shutdown

Useful command for port security
show port-security address
show port-security in fa0/2

Create Vlan
conf t
(config)# vlan 100
(config)# name wireless

show vlan brief

Access port to Vlan

conf t
(config)# int fa0/3
(config)# switchport access vlan 100

Range of port to Vlan

conf t
(config)# int range fa0/5-9
(config)# switchport access vlan 200

Trunk
Trunk is a port which is not member of any vlans

conf t
(config)# int f0/24
(config)# switchport mode trunk

Trunk Useful Command
show int trunk

Show command
show mac-address-table ( shows mac switch)
sh running-config //config stored in RAM
sh startup-config //config stored in NVRAM
sh flash // display memory flash
sh version // all info about device

erase startup-config //erase router config completely

Static Routing

Recursive
(Destination Network) (Subnet mask) (next hub(enter))

Direct
(Destination Network) (Subnet mask) (exit interface)
ip route 192.168.3.0 255.255.255.0 serial0/0/0

Access List

conf t
(config)# ip access-list extended 100
(config)# deny tcp host 172.16.1.2 any eq 80
(config)# permit tcp host 172.16.1.2 any eq telnet
(config)# permit ip any any
(config)# exit
(config)# int f0/0
(config)# ip access-group 100 inbound


conf t
(config)# ip access-list extended Nohttp
(config)# deny tcp 172.16.1.2 0.0.0.0 any eq www
(config)# permit tcp any any
(config)# exit
(config)# int f0/0
(config)# ip access-group Nohttp inbound